Procedure
- In the next Single Choice Message Box, click the SFI that
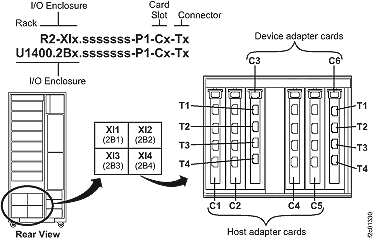
the host adapters will be assigned to, then click Submit. Figure 1. I/O enclosure locations and host adapter card slot locations
- The ServiceActionCompleteForInstallPanelBean window
opens and indicates that the installation is complete. Do not click
Next. Customer host cables can be routed at this time. Note: Fibre-Channel or FICON cables must have been ordered and received separately by the customer before the following steps can be performed. If the cables are not currently available, you may defer the routing of host cables and continue to step 22.
- In the tailgate, squeeze the black release levers
 , pivot the retention bracket up and
then remove it. Figure 2. Tailgate cable and Fibre Channel cable retention (Model 95x shown, Model 96x is similar)
, pivot the retention bracket up and
then remove it. Figure 2. Tailgate cable and Fibre Channel cable retention (Model 95x shown, Model 96x is similar)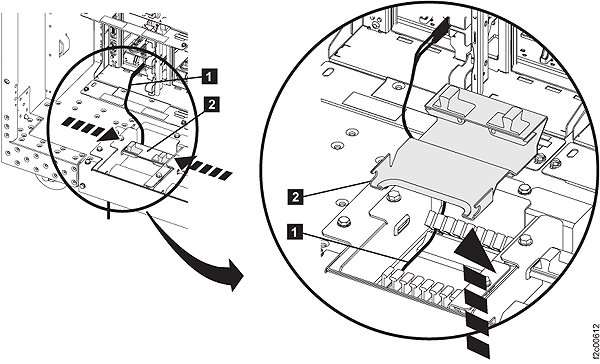
- Feed the host cables
 up through the tailgate and route
them to the destination I/O enclosure and host card adapter ports,
and then plug them in.
up through the tailgate and route
them to the destination I/O enclosure and host card adapter ports,
and then plug them in.
- In the tailgate, squeeze the black release levers