Find the condition that applies:
- SPCN cables are connected to both T4 connectors and the
cables go to the tailgate.
In addition to the location
code label, most of these SPCN cables are labeled "FROM RACK 2."
Go
to step 7.
- SPCN cables are connected to both T4 connectors and go to the
Rack-1 CEC enclosure cable management arms.
In addition
to the location code label, most of these SPCN cables are labeled "FROM
RACK 1."- Disconnect the two cables from the I/O enclosure T4 connectors and use cable ties to fasten
them out of the way.
- Find the two SPCN cable ends
 in the cable bundle that exits the
tailgate. See Figure 5. In
addition to the location code label, most of these SPCN cables are
labeled "FROM RACK 2."
in the cable bundle that exits the
tailgate. See Figure 5. In
addition to the location code label, most of these SPCN cables are
labeled "FROM RACK 2."
- Remove the cable connector protector covers and install them on
the two cables you just disconnected.
- Remove cable ties from the cable bundle down to the tailgate.
- Use the cable location labels to route the two SPCN cables to
the correct I/O enclosure T4
connector. See Figure 6.
- Connect the two SPCN cables.
- Reinstall the cable ties on the cable bundle.
- Go to step 7.
- SPCN cables are not connected to both T4 connectors. The cables are tied into the cable bundle. See Figure 5.
- Remove cable ties from the cable bundle down to the tailgate.
- Use the cable location labels to route the two SPCN cables to
the correct I/O enclosure T4
connector. See Figure 6.
In
addition to the location code label, most of these SPCN cables are
labeled "FROM RACK 2."
- Connect the two SPCN cables.
- Reinstall the cable ties on the cable bundle.
- Go to step 7.
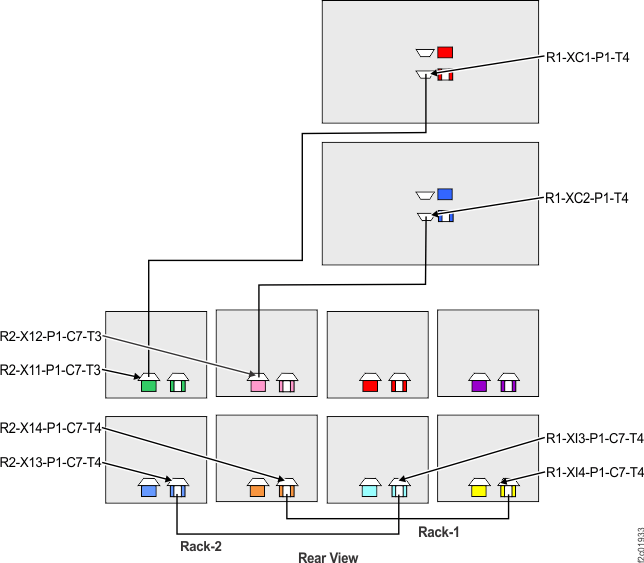
Figure 5. Rack-2 SPCN cables in Rack-1
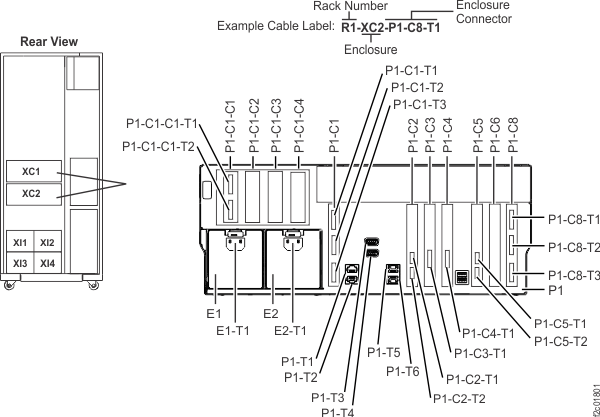
Figure 6. I/O enclosure locations on cable
labels
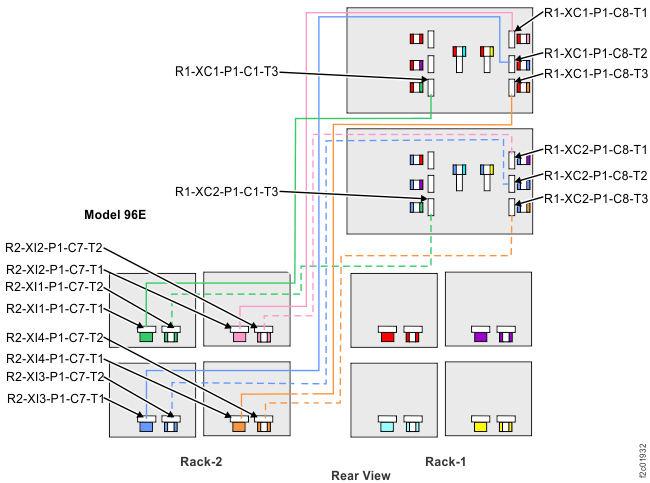
Figure 7. CEC enclosure locations
on cable labels (rear view)
 Figure 2. Rack-2 Mechanical routing of the PCIe and SPCN cables (rack-to-rack)
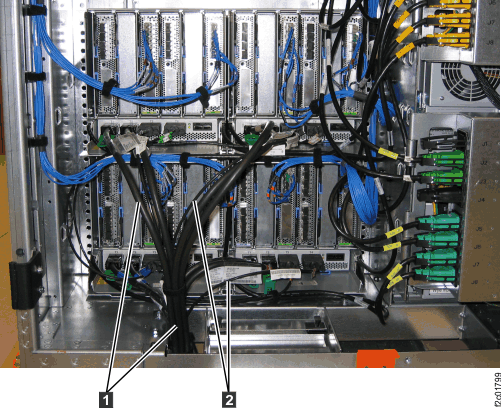
 cables down and out the tailgate.
See Figure 3.
cables down and out the tailgate.
See Figure 3. 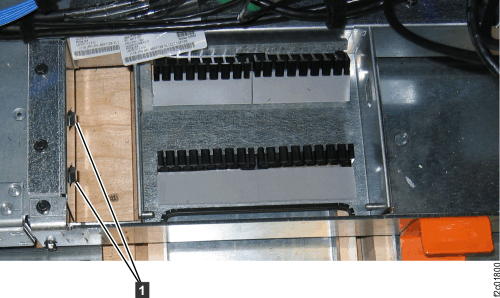
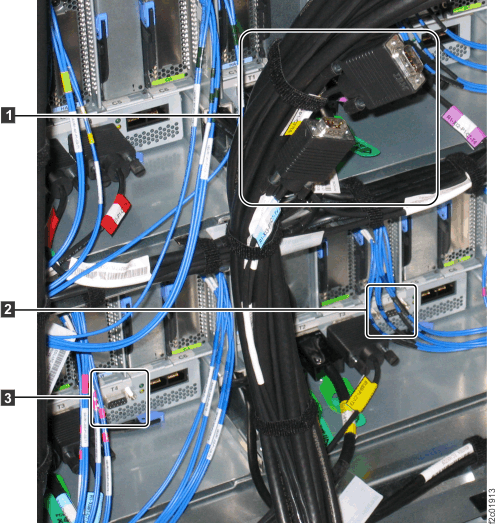 Figure 6. I/O enclosure locations on cable labels
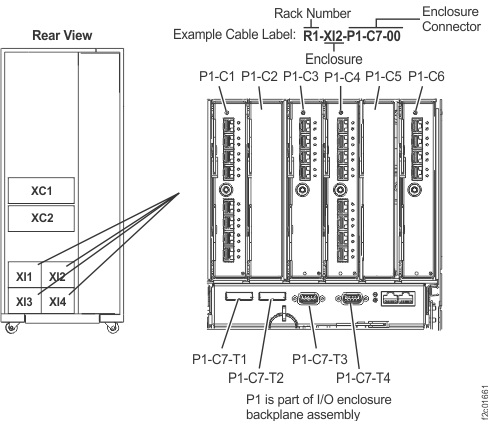 Figure 7. CEC enclosure locations on cable labels (rear view)