Procedure
- Select the following that applies to the management console being installed:
- At the front of Rack-1, above
the CEC enclosures, observe the power LED on the front of the management
console server.
See Figure 1 (X335
server), Figure 2 (X336 server) or Figure 3 (X3550
server).
Is the LED indicator off?
- Yes, go to MAP6520 Management console power problem.
- No, go to the next step.
Figure 1. X335 management console server (front view)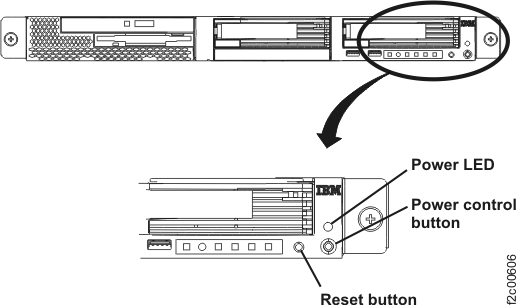 Figure 2. X336 management console server (front view)
 Figure 3. X3550 management console server - operator control panel (front view)
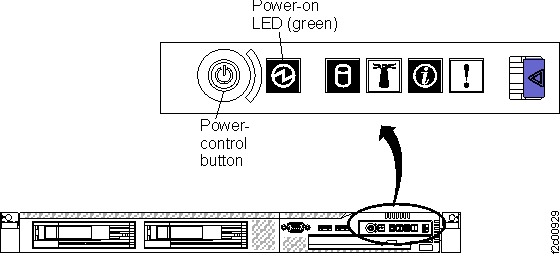
- Is the power LED indicator flashing?
- Yes, push in the Power control button and then continue with the next step.
- No, the LED indicator is on solid. Continue with the next step.
- Slide the management console keyboard and display drawer out to the service position and raise the display panel. If necessary, press the power on button to turn on the display, then go step 7.
- At the front of Rack-1 above the CEC enclosures, slide the management console ThinkPad laptop drawer out to the service position and raise the display panel. If the laptop is not already powered on, press the power on button and then go to step 7.
- At the front of Rack-1 above the CEC enclosures, slide the management console ThinkPad laptop drawer out to the service position. At the rear of the laptop lift the laptop release knob and then rotate the laptop so it faces the front of the rack. Raise the display panel. If the laptop is not already powered on, press the power on button and then go to step 7.
- Wait a maximum of 5 minutes for the HMC
ROLE SELECTION MENU to be displayed. For example:
*****************************************************
*                WELCOME TO THE                     *
*            HMC ROLE SELECTION MENU                *
*****************************************************

ENTER A MENU OPTION FROM THE LIST
1)   ASSIGN HMC AS PRIMARY
2)   ASSIGN HMC AS SECONDARY
99)  EXIT

ENTER YOUR SELECTION AND HIT THE "ENTER" KEY
--> __
Is the HMC ROLE SELECTION MENU displayed?
- Yes, continue with the next step.
- No, this indicates that either the HMC Role has already been assigned
(HMC login screen is displayed) or that the management
console is not
booting correctly.Important: To reset all the HMC code objects to prepare for the installation, the HMC role must transition from Primary to Secondary or Secondary to Primary at least once. If the role does not transition, the code objects will not be reset.
- If the management console login screen is displayed, then go to MAP6090 HMC Role selection not displayed as expected. Return here and continue with step 6 when you correct the problem.
- If the management console login screen is not displayed, go to MAP6020 Management console problem determination.
- Assign this management
console as the
secondary management
console:
- Type 2 and press Enter.
- Type Yes and press Enter to confirm the selection.
- Check the HMC label located on the front of the management console keyboard tray. If it does not indicate MC 2, then locate the label in the ship group and attach it.
- When the keyboard layout configuration
screen is displayed (as shown below), type 2 and press Enter.
If you are using a non English US keyboard, you can choose to change your keyboard layout configuration. You can make your selection by pressing a number key then press enter. If you don't press any key within 30 seconds, this program will terminate automatically. 1 -- Do not change keyboard layout and run this program again on the next system boot. 2 -- Do not change keyboard layout and do not run this program again on the next system boot. 3 -- Change to a new keyboard layout. Your selection is: - If any "License Agreement" pop-up panels are displayed, accept the agreements.
- Wait a maximum of 5 minutes for the HMC
configuration to be updated, and the HMC login screen to display.
Is the management
console login
screen displayed?
- Yes, continue with the next step.
- No, go to MAP6020 Management console problem determination.
- The management
console is shipped
with predefined user IDs and passwords. The user IDs and passwords
are case-sensitive. Enter the user ID and password as shown below.
ID: CE
Password: serv1cece - Go to the next section.