DS8000 Service Documentation Version 6.3.3
Checking rack UEPO switch operation
Procedure
- Do steps 2 through 6 for Rack-1, then repeat steps 2 through 6 for each expansion rack you are installing.
- Remove the lockout tag and/or device that was applied to each customer mainline AC voltage circuit breaker, then switch on the customer circuit breaker.
- Switch on each customer circuit breaker.
- Switch the MAINLINE CB00, on the rear of each primary power supply to On (up).
- Observe the six vertical LED indicators at the front of
each primary power supply (to the left of the fans).
Use Table 1 to find the condition that applies:
Table 1. LED indicators when MAINLINE CB00 is on AC INPUT GOOD UEPO LOOP GOOD PPS Status Display Action On Off Ignore Normal condition, continue with the next step On On Ignore UEPO fault, go to MAP21F0 UEPO loop good LED should be off Off Off Ignore Input power fault, go to MAP2050 Loss of AC Input to a single primary power supply. Note: If both PPSs are failing, then repeat the customer voltage checks done previously. - Using a narrow instrument (such as a small
screwdriver or car key), push the upper half of the red UEPO switch
through the sheet metal slot to reset the switch to the On (up) position.
Use Table 2 to find the condition that applies.
Table 2. LED indicators when UEPO switch is on AC INPUT GOOD UEPO LOOP GOOD PPS Status Display Action On On Blank, U0, XC, or XD or a momentary display of XA. Note: Some levels of PPS firmware will cause an XC or XD error code to be displayed. This is a false error. The condition will remain until the DDM power supply is turned on in a later step. No action is required. Continue with the next step.Normal condition, continue with the next step. On On Two-character status code other than Blank, U0, XC, XE or XF. Go to MAP21A0 PPS fault isolation during install. On Off Ignore the status code on the display. UEPO fault, go to MAP21E0 UEPO Loop Good LED should be on. - Swing the 208VDC bus bar gate back into its non-service position. Reinstall and tighten the two retaining screws.
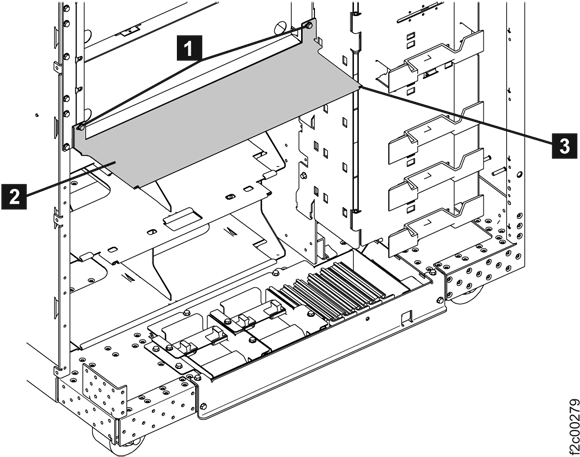
- For an expansion rack, if you removed the air
baffle 2 earlier to allow the 208VDC
bus bar to swing open, then reinstall it now. See Figure 1. Figure 1. Air baffle
- Continue with Determining the management console configuration.