About this task
DANGER
The DS8000® will
be powered on automatically during this procedure. Hazardous voltages
will be present. Ensure that all safety covers are in place and that
normal safety precautions are taken.
Procedure
- On Rack-1, set the Local/Remote switch on the LR/ZLR
card to Remote (right position). For
rack version 2, Remote is toward the rear of the rack. Figure 1. zSeries local remote switch card (local/remote switch card similar)
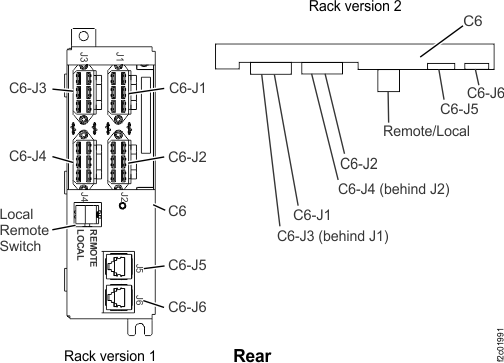 Figure 2. Base rack locations, front and rear
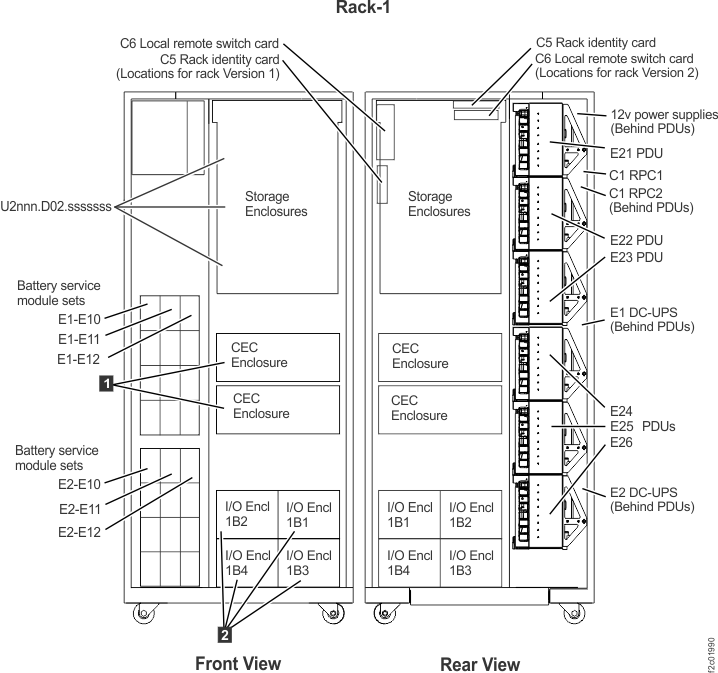
- Follow the HMC prompts to perform the
following tasks: Note: Starting with LMC bundle 87.20.xx.xx, the DDM certify prompt for sub-steps a and b will display after step 15.
- If prompted, install the storage
facility configuration media from the new storage facility into HMC
(MC 1) in the existing storage facility. The media can be an SDHC
memory card or a CD. See Figure 3. Notes:If you are adding a new storage facility to an existing storage complex, you must do one of the following:
- The configuration information for each storage facility is already stored on the HMC. A backup copy is shipped with a new storage facility on either an SDHC memory card or a CD.
- If the HMC media card reader slot is sealed with tape, the SDHC memory card should already be in the slot.
- If the HMC media card reader slot is empty, the SDHC memory card or CD should be in the CE envelope. If not, then check the customer envelope or shipping material.
- Transfer the SDHC memory card from the HMC in the new storage facility (MC 2) to the HMC in the existing storage complex (MC 1). Ensure the SDHC memory card is marked with the serial number of the new storage facility. After the installation is complete, remove the SDHC memory card and reinsert it in the MC 2 in the storage facility being installed. If the process fails with the SDHC memory card installed, go to the next substep.
- Insert the configuration CD from the new storage facility ship group into the HMC in the existing storage complex. After the installation is complete, remove the CD and discard it.
- If you cannot find either media, stop and call the next level of support.
If you are installing the first storage facility in this storage complex, you must do one of the following:- Determine if the SDHC memory card is in the HMC media card slot ( 1 Figure 3, or 7 Figure 4); if it is, proceed. If it is not, locate it and insert it, then proceed. After the installation is complete, leave the SDHC memory card in the HMC media card slot. It will be ready to use for error data offload. If the process fails with the SDHC memory card installed, find the CD and insert it, then proceed.
- If there is no SDHC memory card, find the CD and insert it, then proceed.
- If you cannot find either media, stop and call the next level of support.
Figure 3. Management console media slots (T520, T530)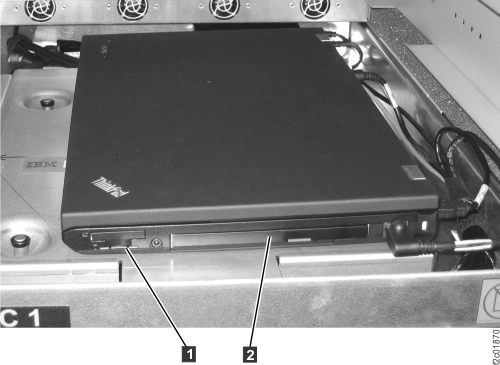 Figure 4. Management console left side view (T540)
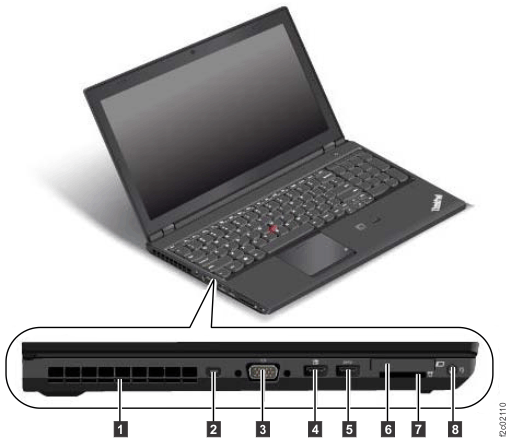
- If prompted, install the storage
facility configuration media from the new storage facility into HMC
(MC 1) in the existing storage facility. The media can be an SDHC
memory card or a CD. See Figure 3.