Attention: The
CEC enclosure power supply shipping brackets must be removed and the
power supplies must be docked at this time. If the CEC enclosure
power supplies are not docked when power is applied to the rack, storage
facility install problems will result.
Procedure
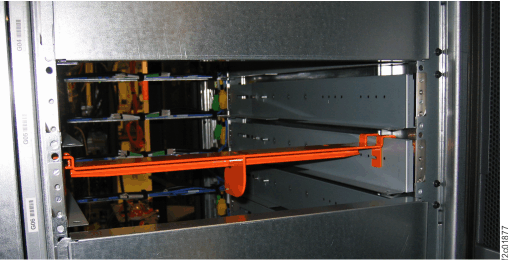
- At the rear of Rack-1, remove the orange power supply shipping
bracket from both CEC enclosures. See Figure 1.
- Remove both screws
 and then lift the orange shipping
bracket up and out of the rack.
and then lift the orange shipping
bracket up and out of the rack. - Store the brackets and screws (if possible) for reuse when the rack is shipped to IBM® or another destination.
Figure 1. CEC enclosure power supply shipping bracket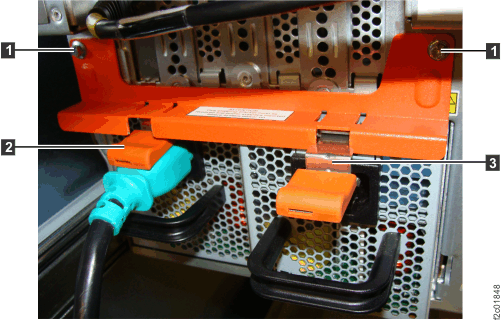
- Remove both screws
- Firmly push in all four CEC enclosure power supplies
until the orange release latches

 snap up into place. See Figure 1.
Test the latch by giving each power supply black handle a gentle pull.
snap up into place. See Figure 1.
Test the latch by giving each power supply black handle a gentle pull. - Loop
through the black handles and reconnect the two green (leftmost) and
two yellow (rightmost) power cables. See Figure 2. The inset at the upper left is a view from
the rear of the rack, the rest of the figure is looking down from
the top of the rack. Figure 2. CEC enclosure power supply power cable loops
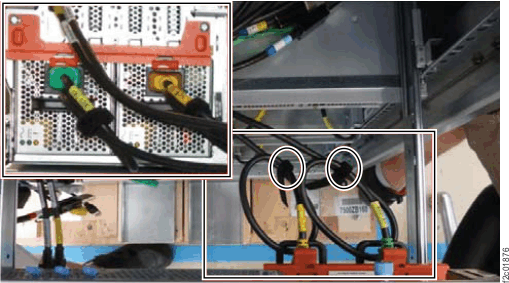
- Remove the orange brackets.
See Figure 3.
- Remove the upper and lower screws 1 2 .
- Move the cable support rod 3 out of the way.
- Remove the orange shipping brackets.
- Move the cable support rod back in position and reinstall both screws in each bracket.
- Store the brackets in the document enclosure at the upper left front of the rack.
Figure 3. CEC enclosure right shipping bracket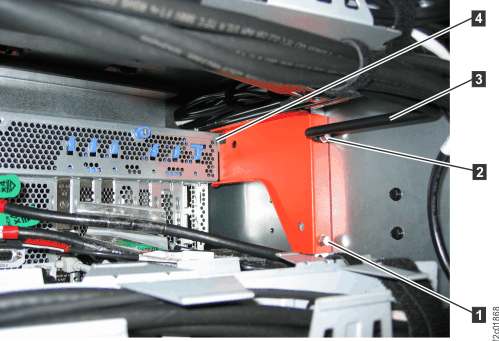
- At each rack being installed, remove any storage enclosure
shipping brackets and store them on unused storage enclosure rails
(if available).
- At the rear of the rack, loosen the nylock nut 1 that attaches the orange shipping bracket to the left and right horizontal rails. See Figure 4.
- Slide the bracket away from the storage enclosure so the middle support cross pin 2 disengages from the slot. See Figure 4.
- Tighten the nylock nuts.
- Store the brackets on unused storage enclosure rails, if available. See Figure 5.
- Go to step 7.
Figure 4. Storage enclosure shipping bracket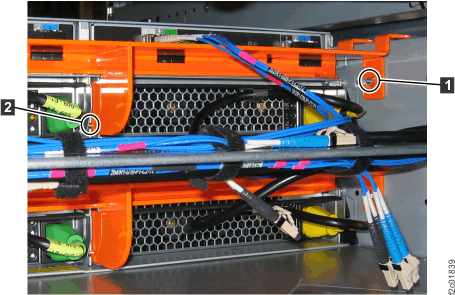 Figure 5. Storing the storage enclosure brackets (front view)