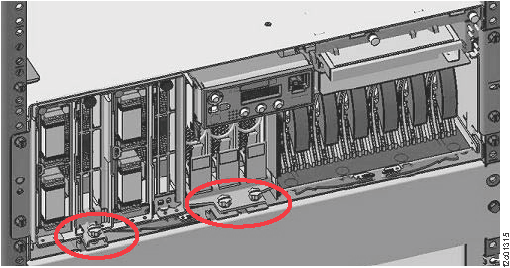
Procedure
- Remove the shipping brackets that are mounted on the system
processor card assemblies and system processor voltage regulator cards.
See Figure 1. Figure 1. Shipping brackets - system processor card assembly and system processor voltage regulator cards (front of CEC)
- Do not discard the shipping brackets and finger assemblies.
Reassemble them and store them in the document enclosure (upper left
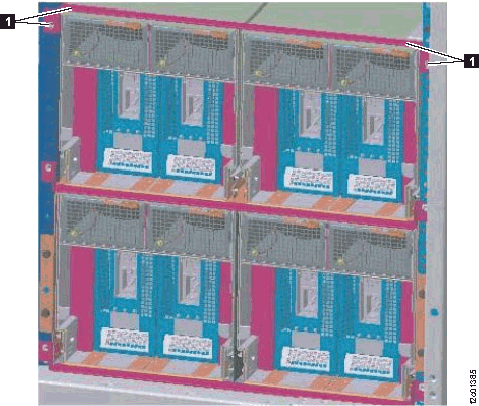
at the front of the rack). Note: To remove the shipping bracket from the lower system processor assembly, it might be necessary to remove the hold-down bracket from the upper pair of I/O enclosures (rB1, rB2). See Figure 2.Figure 2. I/O enclosure hold-down bracket, removal
- Do not discard the shipping brackets and finger assemblies.
Reassemble them and store them in the document enclosure (upper left
at the front of the rack).
- Remove the orange shipping bracket from the rear of each
CEC enclosure to prevent the CECs from overheating.
- At the rear of Rack-1, first loosen the T-bracket screws
to allow the T-bracket to drop clear of the power supplies, then remove
the entire bracket assembly. It is not necessary to completely remove
the T-bracket. See Figure 3. Figure 3. Shipping bracket mounting screws (rear of CEC)
 Figure 4. Shipping T-bracket and mounting screws (rear of CEC)
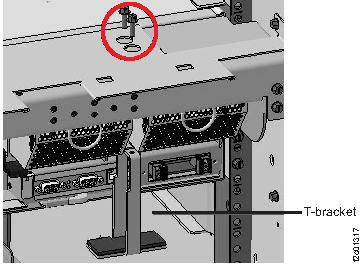
- At the rear of Rack-1, first loosen the T-bracket screws
to allow the T-bracket to drop clear of the power supplies, then remove
the entire bracket assembly. It is not necessary to completely remove
the T-bracket. See Figure 3.