DS8000 Service Documentation Version 6.3.3
Removing right end and left rear covers from the storage facility
Procedure
- Remove the right end cover
(viewed from the front) from the storage facility.
For example, if you are installing Rack-3, the right end cover is currently on Rack-2.- Pull the upper corners of the cover away from the rack
to release the upper cable ties and
apply even pressure working your way down the sides. See Figure 1. Figure 1. Removing the end cover
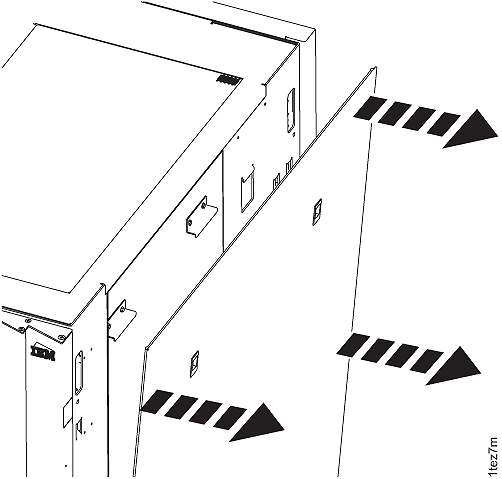
- Pull the upper corners of the cover away from the rack
to release the upper cable ties and
apply even pressure working your way down the sides. See Figure 1.
- Remove the far left rear cover
from the storage facility. Refer to Figure 2.
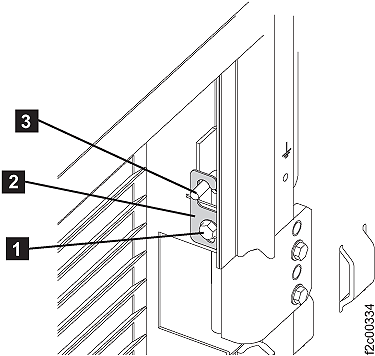
For example, if you are installing Rack-3, remove the left rear cover from Rack-2.Note: On some models, the rack machine type, model, serial (MTMS) label is on the left rear cover, just above the door latch. If the left rear cover is removed from the rack, ensure that it is reinstalled on the correct rack. If the cover is not reinstalled on the correct rack, the incorrect MTMS is displayed on the exterior of the rack, which could result in maintenance errors or other issues. If a reference is needed, the correct rack MTMS is also shown on the "1S" label, affixed to the upper left inside wall of both the front and rear of the rack.- On the upper and lower door hinges, loosen the screw 1 and move the retention plate 2 that prevents the hinge pin 3 from being removed.
- Remove the hinge pins, remove the rear cover and place it in a safe location.
Figure 2. Removing rear left cover (right rear cover similar)