DS8000 Service Documentation Version 6.3.3

Routing and connecting the FC-AL cables

About this task

Note: If an FC-AL cable is damaged, you can use the point-to-point cabling diagrams to determine the other end of the cable. See Point-to-point cabling diagrams - FC-AL cables. Several FC-AL cables are tightly bundled together so it is difficult to physically trace an individual FC-AL cable from end to end.

Procedure

  1. Are you installing Rack-2?
    • Yes, the blue FC-AL cables are already routed within Rack-2, go to step 5.
    • No, the blue FC-AL cables must be routed between the racks, go to the next step.
  2. Do the following:
    1. Find and uncoil the blue FC-AL cables that are coiled at the top front and rear of the rack. Do not remove the black protective cable connector covers.
    2. Use Table 1 to determine the destination rack number for these cables.
      Table 1. Destination rack for cable bundles
      If you are installing rack: Route the loose end of the FC-AL cable bundles to rack:
      3 1
      4 2
      5 3
    3. Find the rack number label located where the cable assembly is bundled together, within 60 cm (24 in.) of the connectors. See Figure 1.
    4. Find the enclosure location code labels at the loose ends of each FC-AL cable bundle. Each bundle might have four sub-bundles that go to either two storage enclosures or two I/O enclosures.
    5. Use Figure 2 to translate the label location to a physical location. The label identifies the I/O enclosure or storage enclosure number location code to where you are routing the cables.
    6. Route each cable bundle to the destination rack through the rack to rack holes near the rack cover upper hinges. Do not connect the cables at this point.
    7. Use existing cable trays and cable ties. Refer to Figure 2 and Figure 4.
      Notes:
      • FC-AL point-to-point cable connection diagrams for various rack models and configurations are in the service information center. (Go to Reference > Cable diagrams > FC-AL cables > Point-to-point cabling diagrams for the FC-AL cables.)
      • The management console cannot be used yet, but the service information center is available on the IBM® DS8000® series Service Documents CDROM in the ship group.
    Figure 1. Rack number label on FC-AL cable assembly
    Rack number label on FC-AL cable assembly
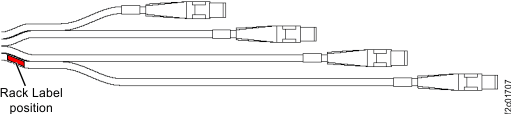
    Figure 2. Cable labels, storage and I/O enclosure locations
    Cable labels, storage and I/O enclosure locations
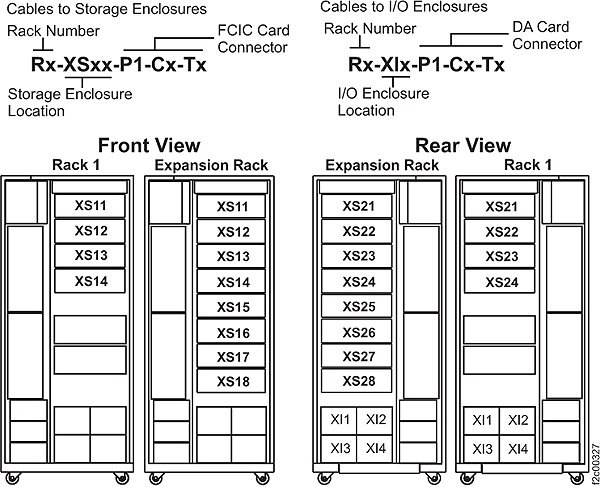
    Figure 3. Cable labels to I/O Enclosures and Storage Enclosures
    Cable labels to I/O enclosures and Storage Enclosures
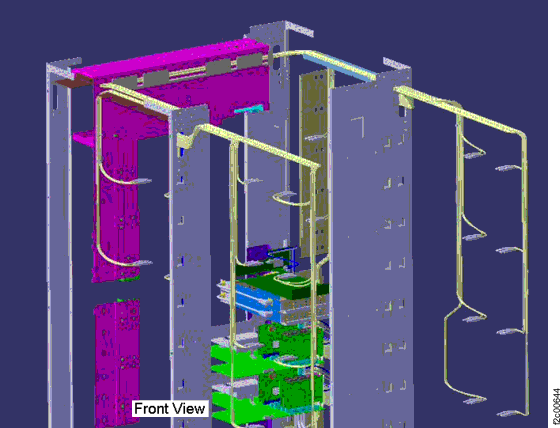
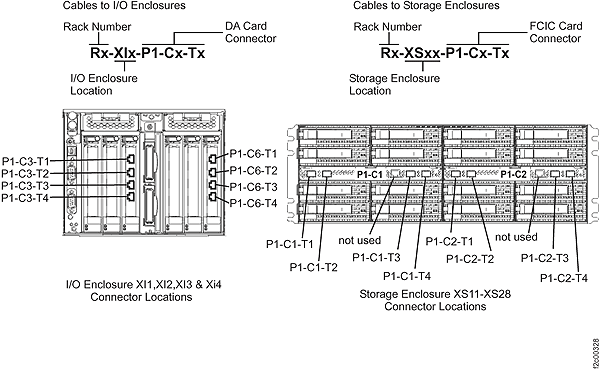
    Figure 4. Mechanical routing of the FC-AL cables (rack-to-rack)
    Mechanical routing of the FCIC cables (rack-to-rack)
  3. After each cable bundle has been routed to its destination enclosure, remove the black rubber protective connector covers.
  4. Plug the FC-AL cables into the connectors on the DA cards in the I/O enclosures or FCIC cards in the storage enclosures as indicated on the cable labels. Refer to Figure 3 for connector locations.
    Note: Do not discard the connector covers, you can store them in the Rack-1 documents enclosure (front upper left).
  5. Do you have additional expansion racks to install on this storage facility?